My Dashboard
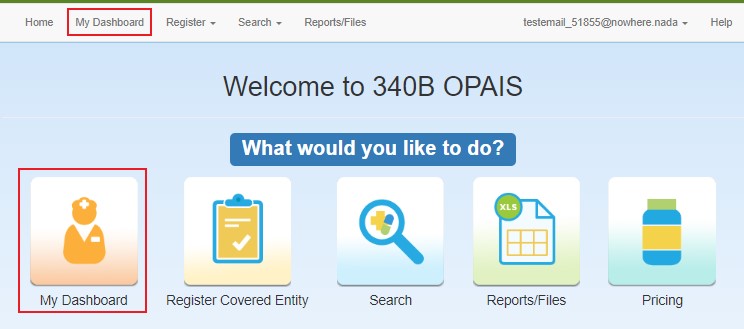
To access My Dashboard, the user can either select the My Dashboard icon or the My Dashboard menu item on the Home page.

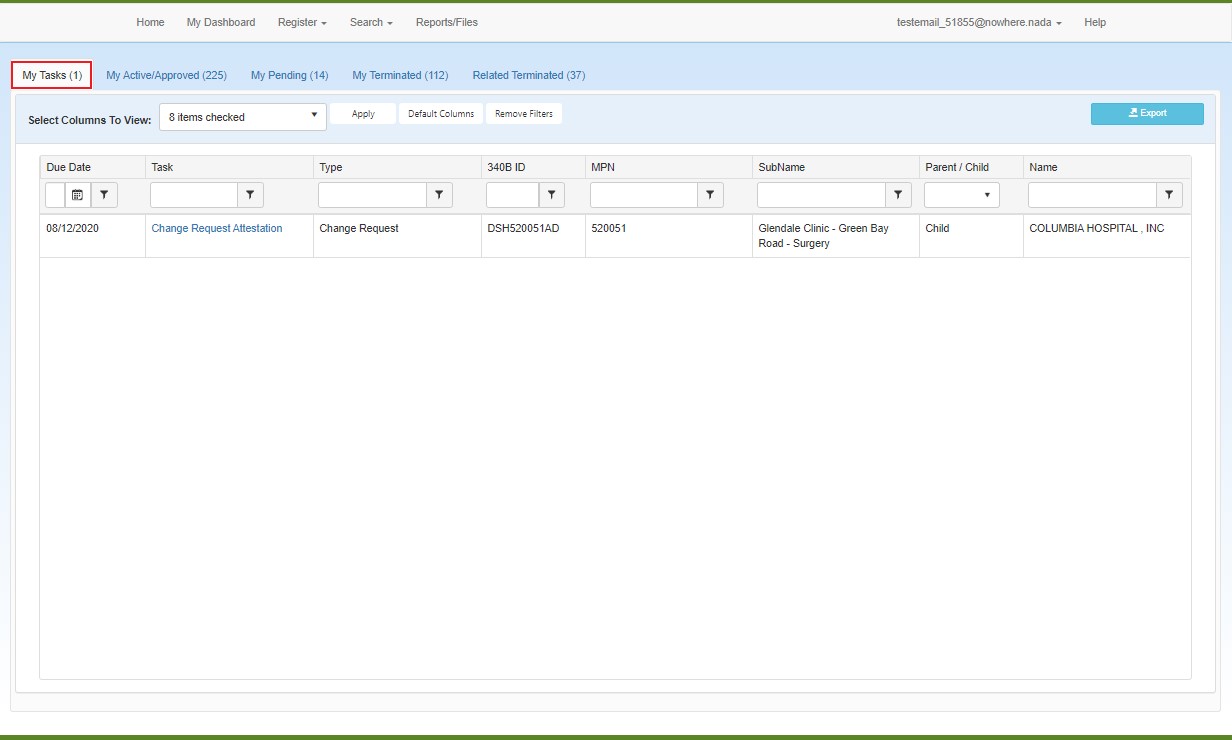
My Dashboard provides the user the ability to see and access:
- The tasks assigned to them
- Their active / approved / to be terminated entities
- Their entities pending OPA approval
- Their terminated entities
- Their related terminated entities, if any exist

If there are no tasks awaiting the user's attention, the My Active/Approved tab will the selected tab instead of My Tasks.
My Dashboard Tables Actions
Every tab on My Dashboard has a set of actions that provide the user the ability to:
- Select the columns to include in the table
- Reset the columns to the default columns
- Clear all the filters set in the table
- Export the data in the table

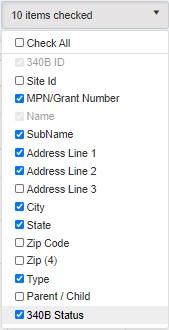
There may be more columns of data that the user might want to see in the data table than are currently being shown. The Select Columns functionality provides the user the ability to select any columns associated with Covered Entities.

Selecting the drop-down will show all the columns available to be displayed.

Check columns to have them be shown and uncheck columns to have them not be shown.
Select the Apply button to have your choices be displayed.
Grayed out columns will always be shown.
On each tab the data in the table can be exported. To perform the export select the Export button.

When selecting the Export button on the My Tasks tab, the export will be generated for a predefined set of columns.
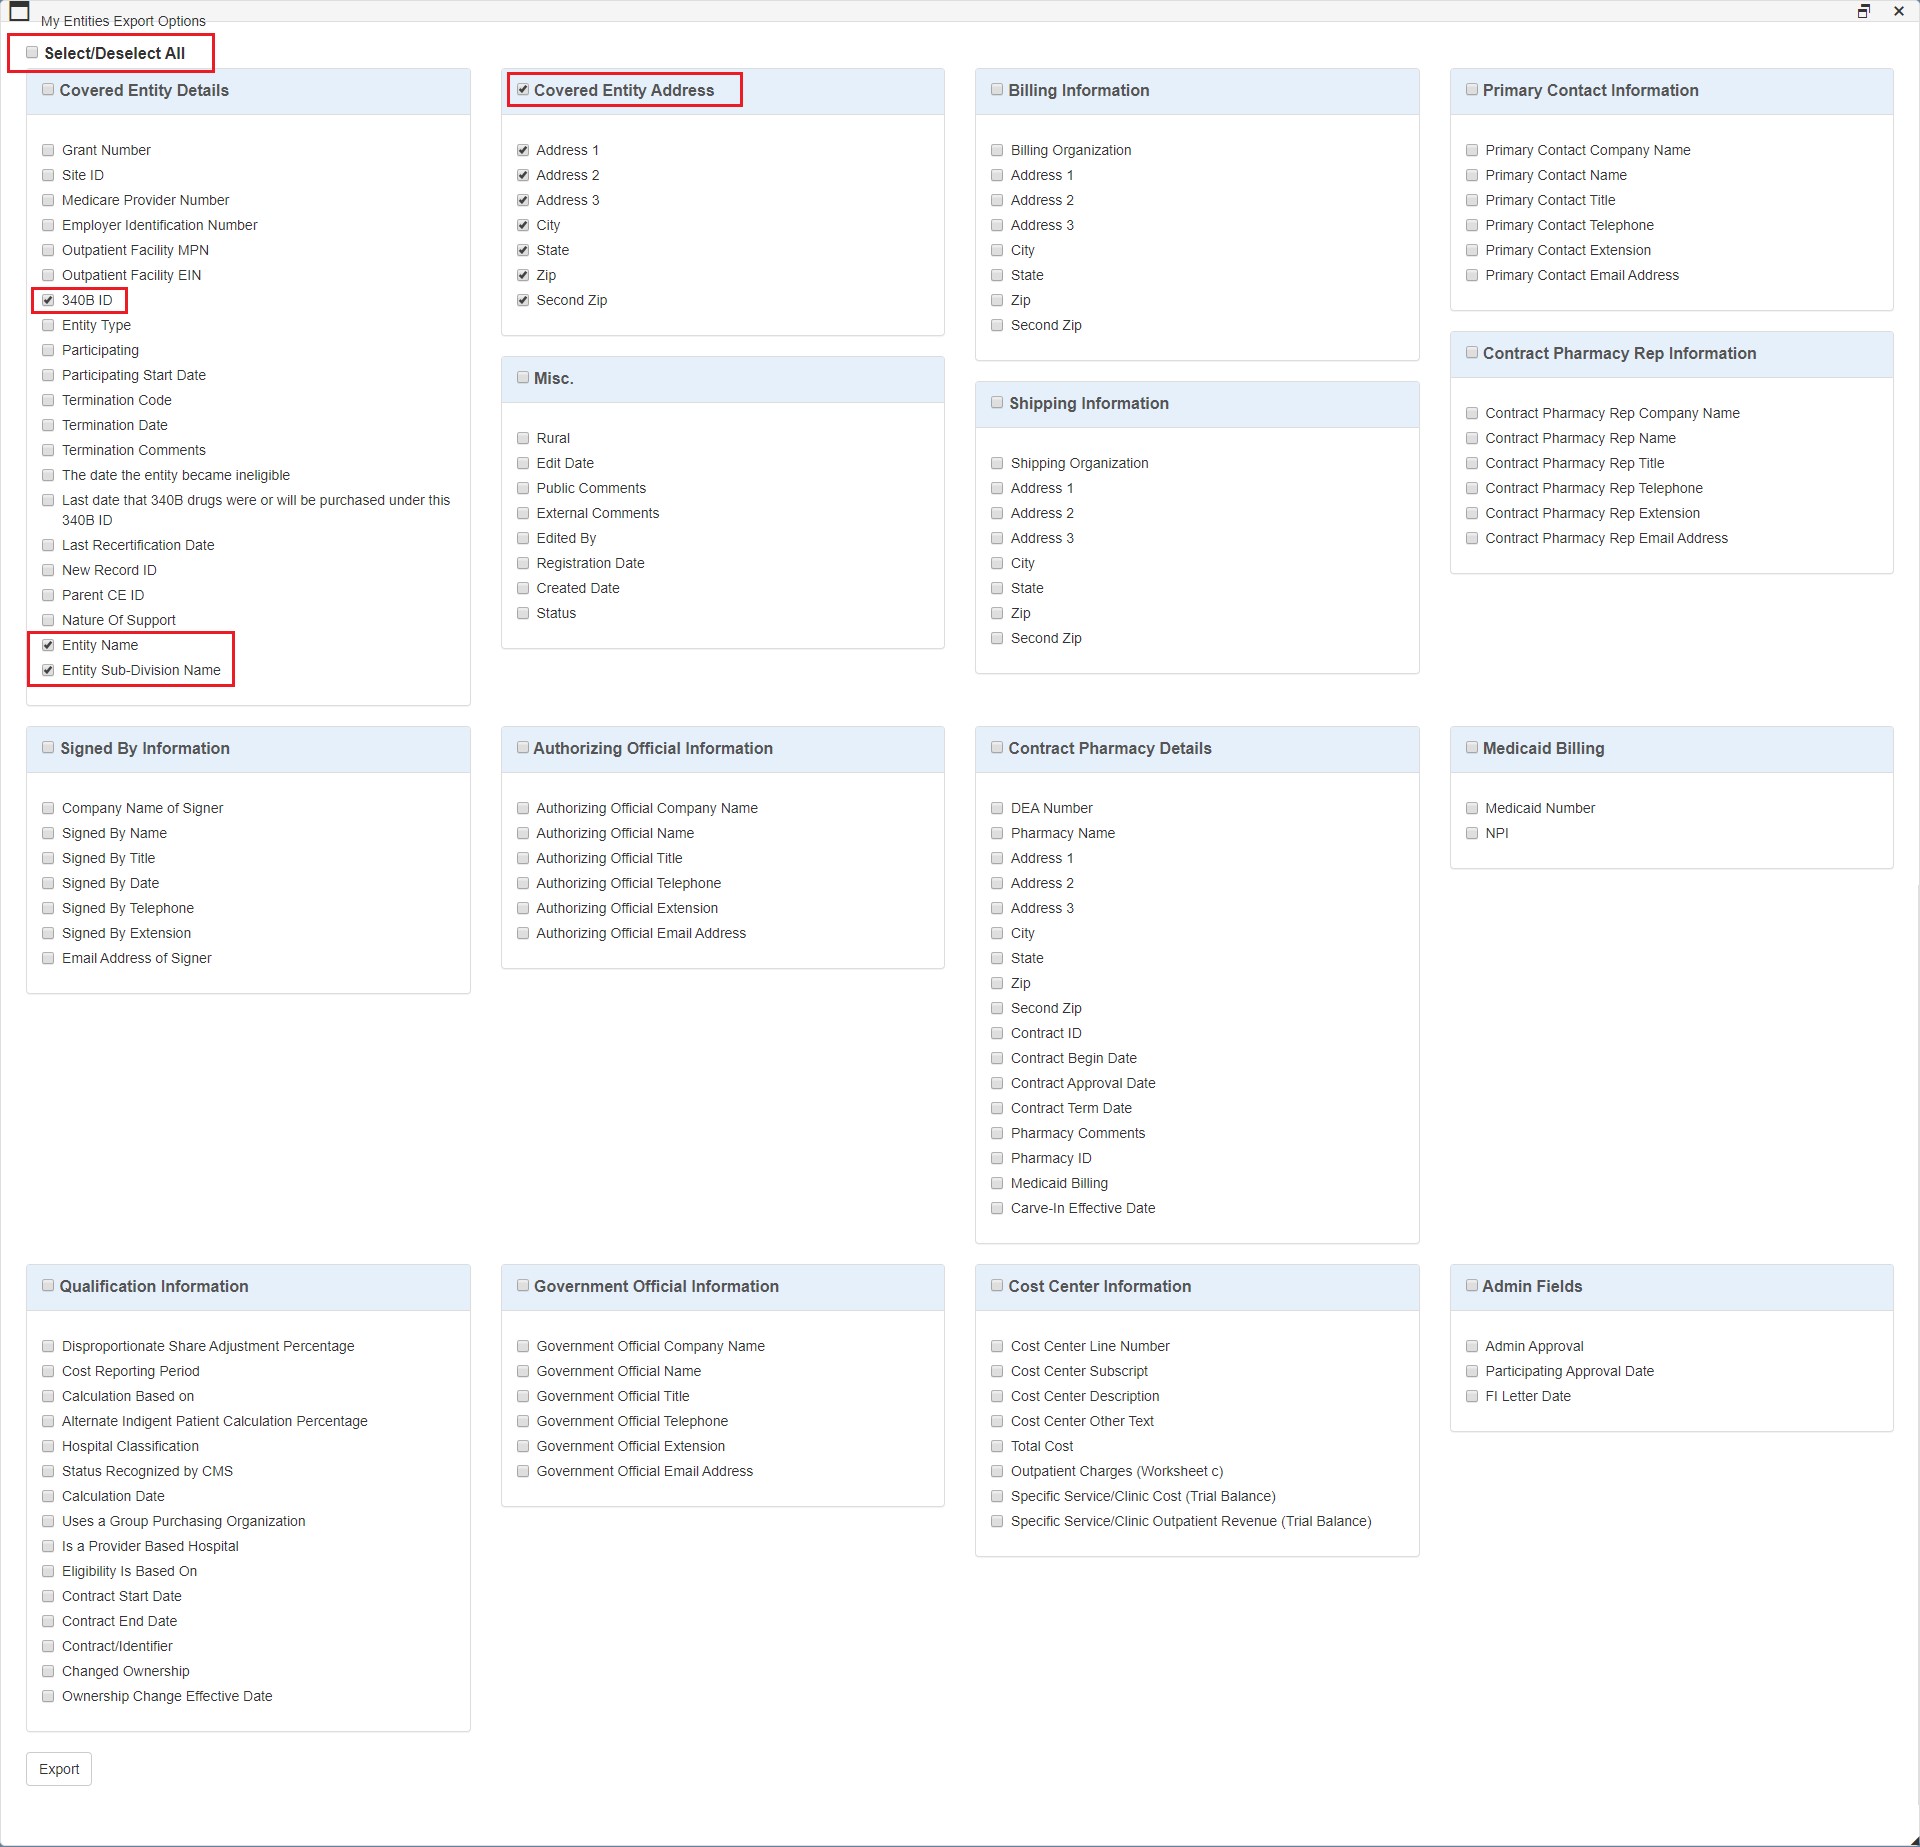
When selecting the Export button on all the other tabs, the Export Options page will be displayed for the user to select the columns to include in the export. The export will be for all of the data within the table.
The Export Options page enables the user to specify only the data that they want to include in the exported spreadsheet.

-
Check the boxes in each section to select the data to be exported.
- Check the Select/Deselect All box if you want all fields listed on the page to appear on the spreadsheet. Uncheck boxes to deselect individual fields.
- Check the box next to a section heading to export all data in that section.
- Check individual boxes to select only specific items for export.
- When finished selecting data for export, click the Export button.
-
A progress window is displayed while the export is being prepared. Click the Cancel button if you want to cancel the export before it finishes.
-
A message window displays when the export is completed and a dialog box will prompt you to open the file or save it for later. If you chose to open it, the exported data is displayed in an Excel spreadsheet.
- Click the Download button if you need to download the file again
- Click the Cancel button to cancel the download and return to your My Dashboard
- Click the Return to Page button to return to your My Dashboard
-
A message window displays when the export is completed and your browser will display a dialog box to prompt you to open the file or save it for later. If you chose to open it, the exported data is displayed in an Excel spreadsheet.
For covered entities with multiple shipping addresses and contracts with multiple pharmacies, there will be a separate row for each address and pharmacy. For example, for an entity with a mailing address, a billing address, two shipping addresses, and five contract pharmacies, there will be nine data rows.


