Requesting Changes to a Group of Covered Entities
A Group Change Request can be submitted when there are similar changes to be made to a group of covered entities.
You must be the logged-in AO or PC of the group of covered entities to submit the group change requests.
-
From My Dashboard, select the group of covered entities that require the same changes. After selecting the group, click on the Group Change Requests from "My Dashboard.
When selecting the covered entities to form the group, choose the entities with the same Authorizing Official, same hospital type and MPN or with the same non-hospital program type. The group change request can have multiple primary contacts for different sub-groups, but all the covered entities should have the same AO.
-
After initiating the group change request, select the changes that will affect all the covered entities in the selected group.
-
There are three types of changes that can be performed in a group change request:
-
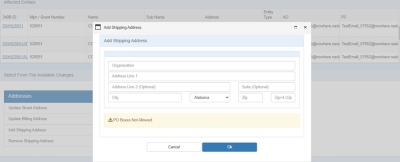
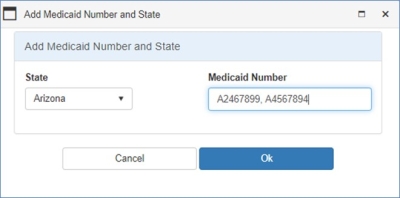
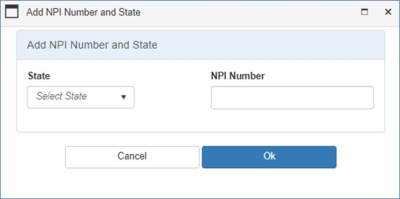
Add – Add values to Covered Entity fields which accept more than one value. When you select to "add" the value(s) entered in the group change request for the field, they will be added to all the covered entities included in the group change request. The change(s) will have no impact if there are entities which already have the value to be added. Examples of fields with multiple values include:
 Shipping Address An address authorized to receive 340B drugs on behalf of a covered entity parent or child site and registered as such on the 340B OPAIS. Because pharmacies are not permitted to be registered as covered entity sites, they may be listed as shipping addresses of the parent entity or a registered outpatient child site, depending on the locations served by the pharmacy. When registering a new covered entity or a new outpatient facility online, the entity has a choice of listing shipping addresses under either the main entity's registration or the offsite facility's registration. Listing shipping addresses permits all parties to know where 340B drugs may be delivered by the manufacturer and wholesaler. Pharmacies that support multiple outpatient facilities should be listed as shipping addresses under the parent entity., Medicaid Number, NPI Number, etc.
 -
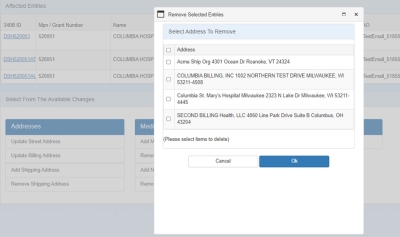
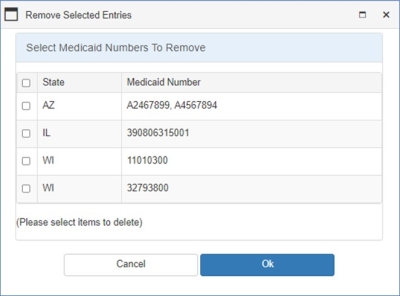
Remove – Remove values from Covered Entity fields which contain one or more values. When you select the change to remove, the unique values present across all the covered entities in the group change request will be displayed. You can select the values(s) to be removed from all the entities. The change(s) will have no impact if there are entities which do not have the selected value to be removed. Examples of fields with multiple values include: Shipping Address, Medicaid Number, NPI Number, etc.
-
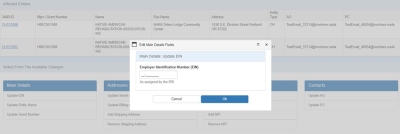
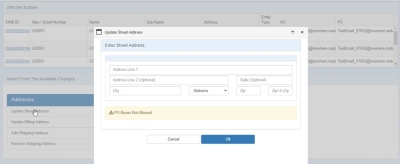
Update – Update the value for a field that takes only one value. When you select to update and enter a new value, it will be applied to all entities added to the group change request. Examples of fields with one value include: EIN, Entity Name,
 Grant Financial assistance mechanism providing money, property, or both to an eligible entity to carry out an approved project or activity. Number, Street Address,
  Billing Address An address verified as belonging to the covered entity that is used for billing purposes. A billing address is not required to be a physical address; it can be a P.O. box or other mailing address., Primary Contact, etc.
-
-
-
The covered entity fields available for changes are listed under each section. Select the field(s) that need to be changed by clicking on the Add/Remove/Update "field name" hyperlink. A pop-up window opens up where you can add a new value or select the value(s) to be removed. In case of updating contacts, a page opens up to enter or select the new contact information.
 Update Contacts - PC or AO (Only available for Non-Hospitals)
-
Enter the email address of the contact by clicking the Continue button.
-
Enter the new contact's email address and click on Search.
-
If the contact is already registered in 340B OPAIS, then the system will display the contact details. Please verify the new contact's information and click Continue to update.
-
If the new contact's email address is not registered in 340B OPAIS, then the system will display the fields to enter the new contact details. Enter the contact information and select Continue to update.
-
-
After completing the changes, add any supporting documents using the Upload Attachments function.
-
Use the Select button to browse and add one or more documents from your computer. After completing uploading the necessary document(s), select Submit to complete uploading attachments and return to the group change request submission.
-
-
Review the pending changes
-
Confirm the changes, add comments to submission if needed and submit.
Group Change Request - Submit Controls Control Description Cancel Cancel any changes and return to My Dashboard Submit Submit the changes in the Group Change Request for review -
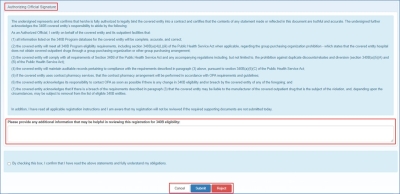
If you are the AO, the Authorizing Official Signature section is appended below the Pending Changes section to allow you to attest to the changes in the Group Change Request.
Group Change Request - AO Approval Controls Control Description Textbox "Please provide any additional information that may be helpful in reviewing this registration for 340B eligibility."
-
Type any comments that will help OPA in approving the Group Change Request.
Checkbox "By checking this box, I confirm that I have read the above statements and fully understand my obligations."
-
Select this box to attest to the changes to be submitted in the Group Change Request for OPA approval.
Cancel Exit from the Attestation page without taking any action Submit After selecting the checkbox to authorize the submission, click this button to submit the Group Change Request for OPA approval. The submission confirmation page will be displayed.
-
The Group Change Request attestation task will be removed from the My Tasks section of the AO's My Dashboard.
-
Upon OPA approval of a Group Change Request, both the AO and
 PC External user who is designated as a Primary Contact for an entity. This user can enter registrations and update entity information. This user can enter registrations, and update entity information. Any changes to an entity performed by the PC user must be attested to by the AO for that entity. will receive an Approval of online 340B Change Request email.
 -
If OPA rejects a Group Change Request, both the AO and PC will receive a Rejection of online 340B Change Request email.
Reject Select this button to reject the Group Change Request. -
-
-
Confirm the changes and submit to OPA for review and approval.


