Exporting Covered Entity Search Results
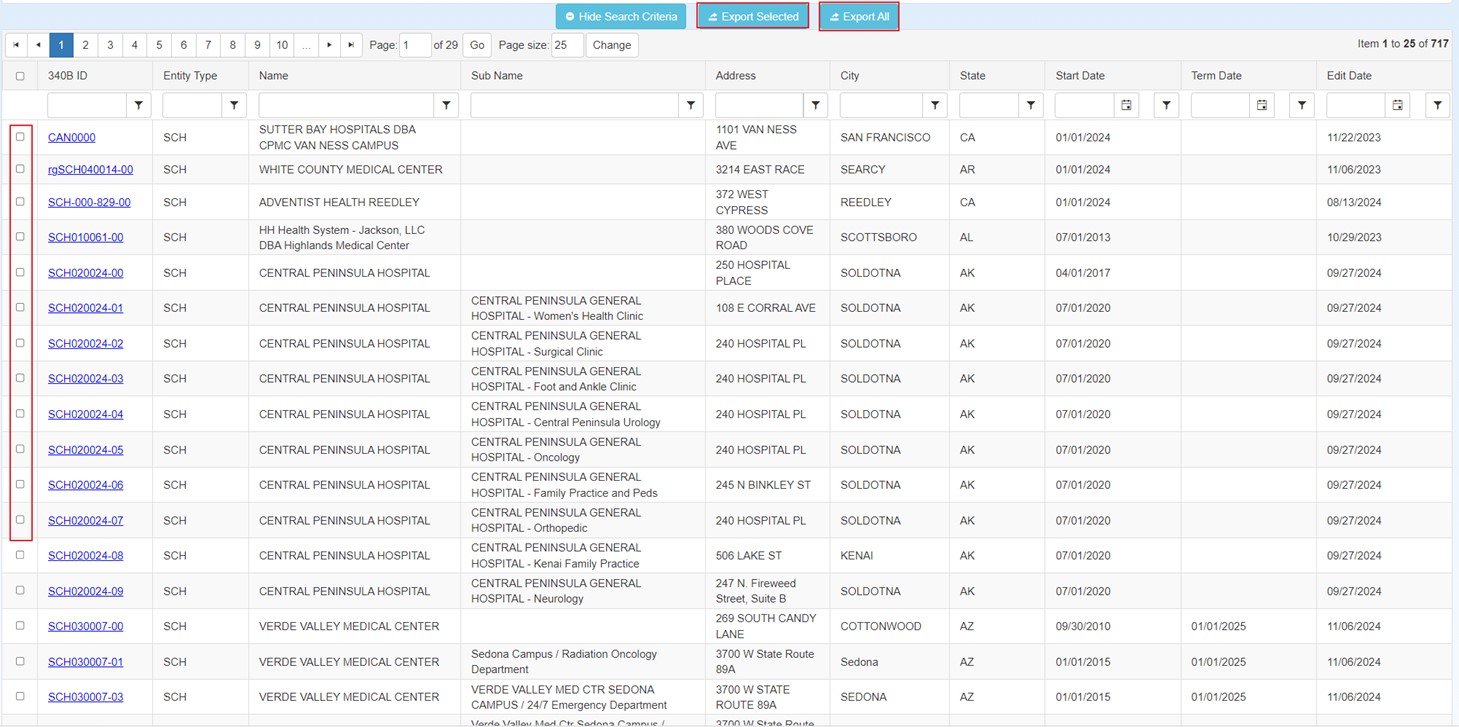
After generating a list of covered entities that match your search criteria and sorting and filtering the data, you can export the covered entity data to an Excel spreadsheet.
| Control | Description |
|---|---|
|
Export Individual Covered Entities |
|
|
Export All Covered Entities on the Current Page |
|
|
Export All Covered Entity Search Results |
|
Covered Entity Export Options
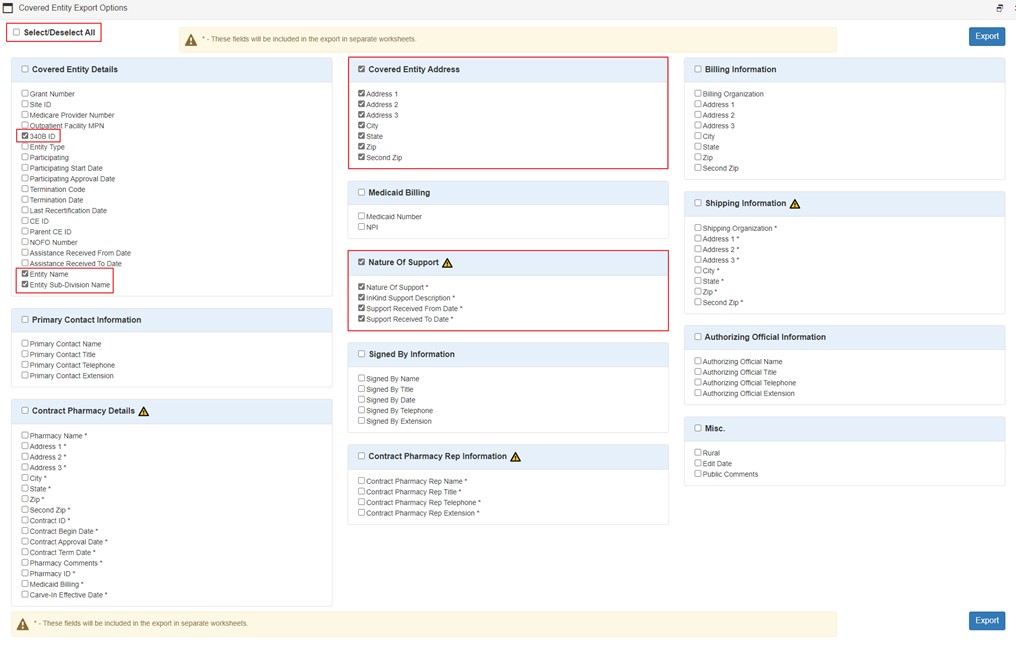
The Covered Entity Export Options page enables you to specify the data fields that will be included in the export.
-
Check the boxes in each field group to select the data to be exported.
- If all of the data in all of the available fields is to be exported, check the Select/Deselect All box. Unchecking this box will deselect all the selected fields.
- If all of the data in all of the available fields within a field group is to be exported, check the box next to a field group heading. Individual fields can then be deselected. Unchecking this box will deselect all of the selected fields in the field group.
- Check individual boxes to select only specific items for export.
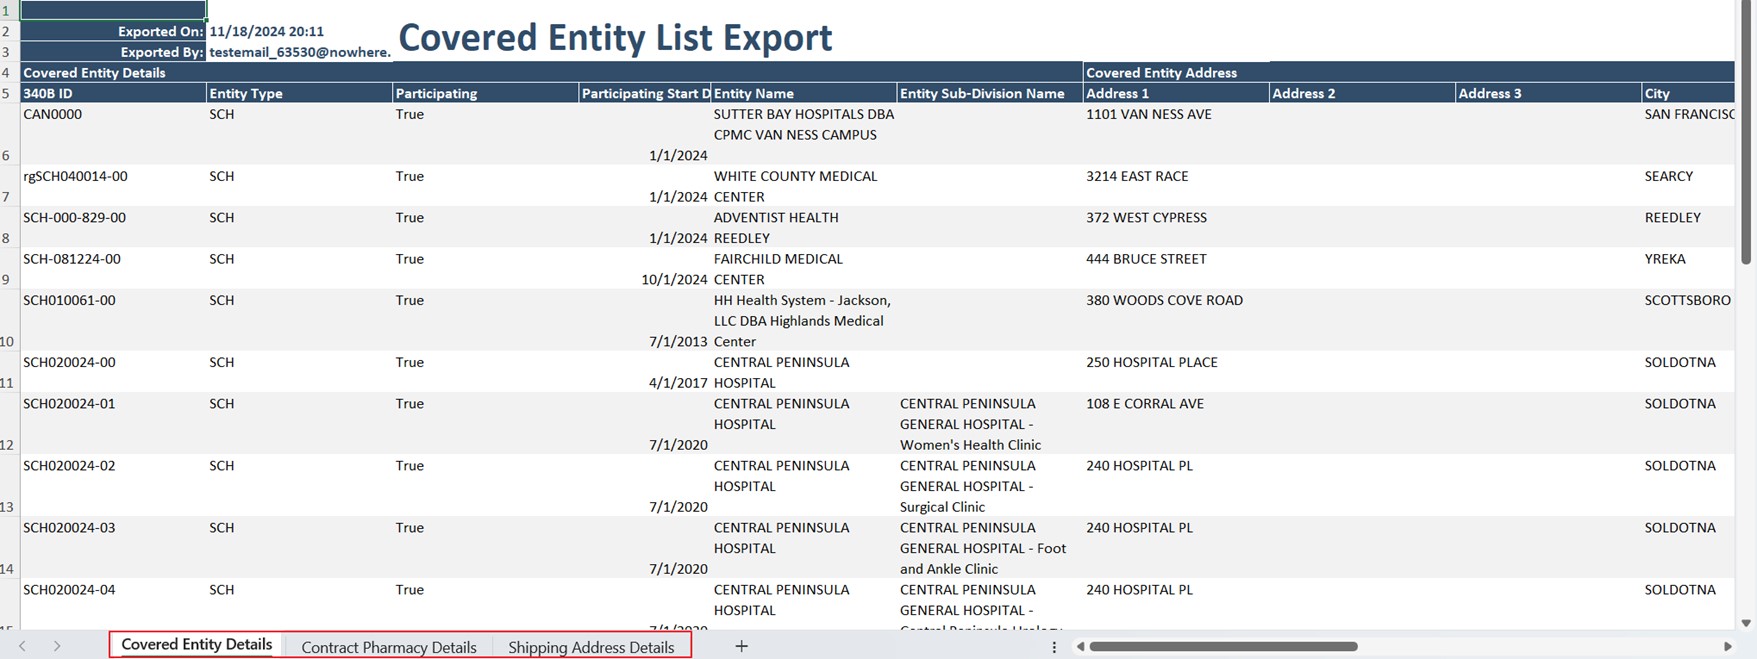
The fields under each section (for example, covered entity details, contract pharmacy details, etc.) will be displayed in the exported Excel sheet in the order they were selected.
-
Sections marked with a warning icon indicate that the fields under these sections may contain multiple values. When fields from these sections are selected for export, the values will be exported to a separate worksheet in the exported Excel spreadsheet. Each separate worksheet will contain a fixed set of identifying covered entity fields and the fields selected from the various sections that can contain multiple values.
-
Worksheets Description Covered Entity Details Displays the CE Details of the covered entities selected for export. Contract Pharmacy Details Displays the associated Contract Pharmacy details for each of the covered entities selected for export.
Each row has a set of identifying CE fields in the Contract Pharmacy Details worksheet.
If If the selected covered entity does not have any associated contract pharmacy, then then the contract pharmacy fields for that covered entity is empty.
 Shipping Address An address authorized to receive 340B drugs on behalf of a covered entity parent or child site and registered as such on the 340B OPAIS. Because pharmacies are not permitted to be registered as covered entity sites, they may be listed as shipping addresses of the parent entity or a registered outpatient child site, depending on the locations served by the pharmacy. When registering a new covered entity or a new outpatient facility online, the entity has a choice of listing shipping addresses under either the main entity's registration or the offsite facility's registration. Listing shipping addresses permits all parties to know where 340B drugs may be delivered by the manufacturer and wholesaler. Pharmacies that support multiple outpatient facilities should be listed as shipping addresses under the parent entity. Details
Displays the shipping address details for each covered entity selected for export.
There is a
 340B ID A unique identification number assigned by OPA to each covered entity parent or child site (e.g., child site, subdivisions, or sub-grantees). Street Address field that indicates whether the displayed Shipping Address is a separate Shipping Address or the Street Address. It can take the following values:
-
Yes - indicates that the Shipping Address in the export is the Street Address
-
No - indicates that the address is a dedicated Shipping Address for the Covered Entity
Nature of Support Details Displays the associated Nature of Support details for each of the covered entities selected for export.
Each row has a set of identifying CE fields in the Nature of Support Details worksheet.
If the selected covered entity does not have Nature of Support or the Nature of Support fields are not applicable to the covered entity, then the nature of support fields for that covered entity are empty.
Cost Center Details Displays the associated Cost Center details for each of the covered entities selected for export.
Each row has a set of identifying CE fields in the Cost Center Details worksheet.
The cost center fields are displayed only for outpatient facilities. For parent hospitals and non-hospitals, the cost center fields are empty as they are not applicable.
Report Configuration Displays the Search Criteria, the criteria values and export options selected in the export. -
-
- When finished selecting fields of the data to be exported, click either of the Export buttons.
-
A progress window is displayed while the export is being prepared. Click the Cancel button if you want to cancel the export before it finishes.
-
A message window displays when the export is completed and a dialog box will prompt you to open the file or save it for later. If you chose to open it, the exported data is displayed in an Excel spreadsheet.
- Click the Download button if you need to download the file again.
- Click the Cancel button to cancel the download and return to the search results page.
- Click the Return to Search Page button to return to your search results page.
-
A message window displays when the export is completed and your browser will display a dialog box to prompt you to open the file or save it for later. If you chose to open it, the exported data is displayed in an Excel spreadsheet.


