Requesting the Termination of a Labeler Code
You must be the AO or PC to terminate a Labeler Code.
-
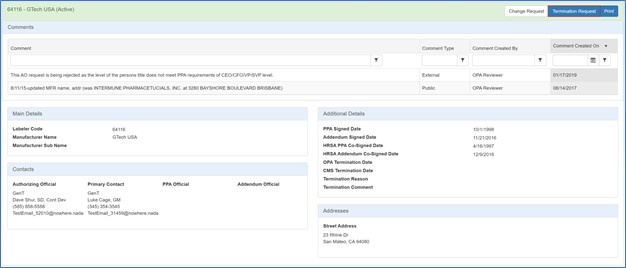
From the Labeler Code details page for an active Labeler Code for which you are responsible as AO or
 PC External user who is designated as a Primary Contact for an entity. This user can enter registrations and update entity information. This user can enter registrations, and update entity information. Any changes to an entity performed by the PC user must be attested to by the AO for that entity., click the Termination Request button.
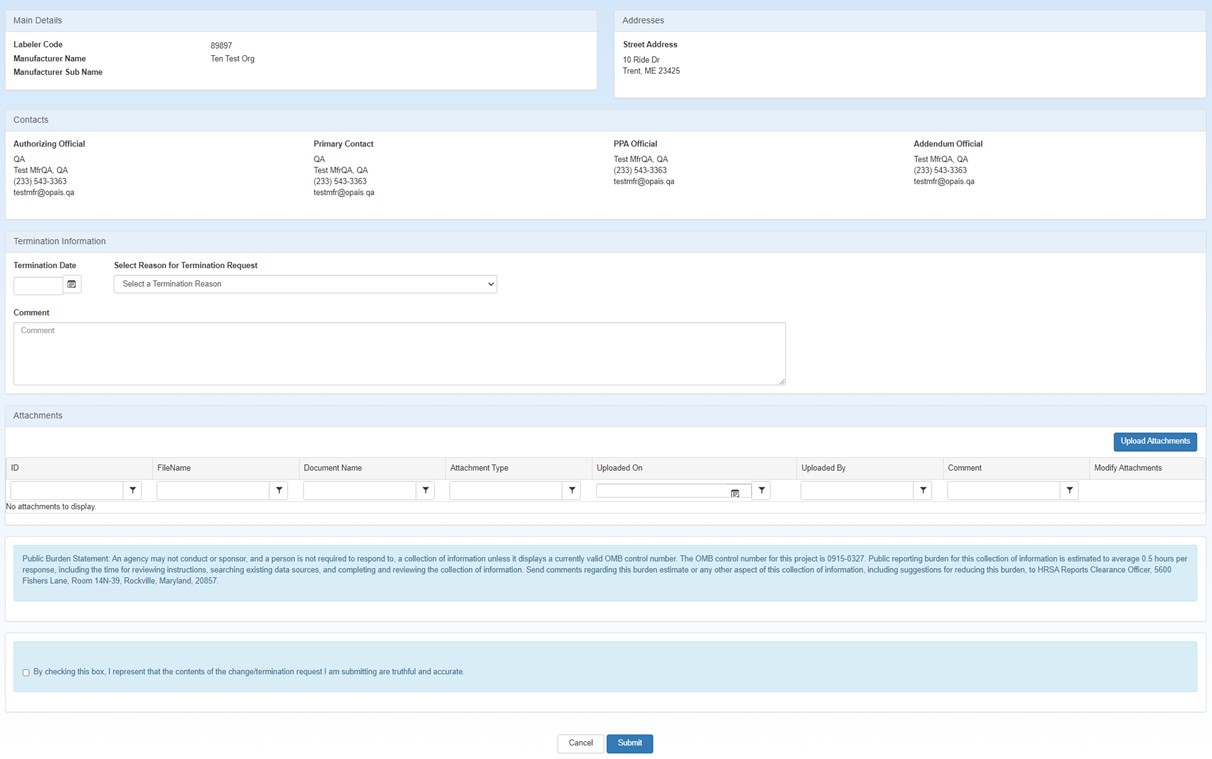
The Labeler Code Termination Request will be displayed.
-
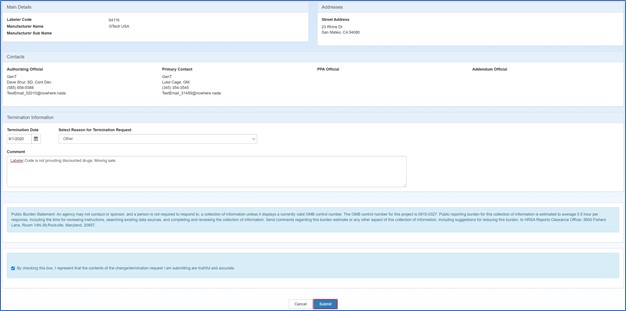
Enter a
 Termination Date The date in the 340B OPAIS on which a provider's participation in the 340B program is terminated. After its termination date, a provider can no longer purchase 340B drugs. OPA updates termination dates on a quarterly basis., select Termination Reason, and add a Comment as needed.
Labeler Code Termination Information Termination Information Description Termination Date Request a termination date.
You can only enter today's date or a future date.
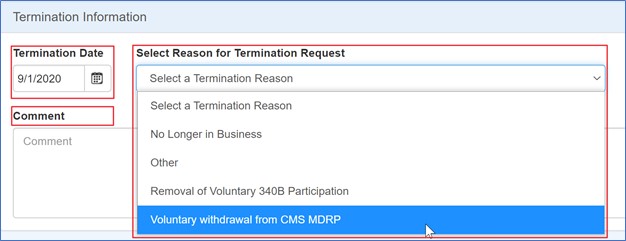
Select Reason for Termination Request Select Termination Reason from the drop-down:
1. No Longer in Business
2. Other
3. Removal of Voluntary 340B Participation
4. Voluntary withdrawal from
 CMS Centers for Medicare and Medicaid Services, the federal agency within Health and Human Services (HHS) that administers the Medicare and Medicaid programs, including the Medicaid drug rebate program and the Medicare Part D prescription drug benefit. MDRP
Comment Enter a comment.
If you selected “Other” as the termination reason, then you must enter a comment
-
Select the Upload Attachments button to upload one or more attachments:
-
When the attachments upload selection page displays, click the Select button, navigate to the file you want to upload, and select it.
-
Follow these file attachment rules to prevent rejection during upload
-
Only .docs, .xlsx, .pdf, .png, .tif, .jpg, .eml, and .msg formats are allowed. Excel files must not be macro-enabled. File size is limited to 50MB.
-
Files must not be password protected
-
Files must pass virus scan.
-
Number of uploaded files must not exceed 10 files per submission.
-
-
As each file is selected, it will appear on the attachments upload selection page.
-
The file name of the attachment will appear in the Document Name box. It may be changed to better describe the attachment if desired.
-
Under Attachment Types, click the appropriate check box(es) to identify the type of attachment. You will be required to select at least 1 attachment type for each attachment.
-
Multiple boxes may be selected if the attachment includes multiple worksheets
-
Type any relevant notes in the Attachment Comments text box.
-
-
Repeat the steps above to select and identify additional attachments.
-
Click the Submit button to proceed when finished selecting attachments.
-
The system will display a list of the selected attachments.
Field Description ID A unique system-generated identifier associated with the attachment file. Filename Click the link to open the attachment with the application that created it (e.g., Excel). Document Name Optional user-entered description of the attachment (defaults to the file name). Attachment Type User-selected type identifier. Uploaded On Date when the attachment was uploaded. Uploaded By Email address of the user who uploaded the attachment. Comment User comment entered when the attachment was uploaded. Modify Attachments Edit – Return to the attachments upload selection page to edit the document name, attachment type or comment.
Remove – Delete the associated attachment from the entity.
Upload Attachments Upload additional attachment files.
-
-
Click the Submit button to submit the termination request.
-
If you are the PC, then System will send your termination request to AO for attestation. If you are the AO, then your termination request has been submitted to OPA for review.
-
System will display a confirmation message. Click the OK button to submit the termination request and return to My Dashboard.


