Requesting to Become the AO of a Covered Entity
Any logged-in covered entity user can request to become the AO of a parent hospital or non-hospital with which they are not currently associated. The user requesting to be the new AO must be fully authorized to legally bind the covered entity. All AO change requests must be approved by OPA. Upon approval from OPA, the system will send an email notification of the change to both the new AO and the current AO (if still active in the system).
AO Change Requests for hospitals must be submitted through the parent hospital entity. The AO change will affect all child entities.
In case the PC also needs to be changed, then the requestor can enter the PC information along with the new AO information. The external user requesting this AO Change has to be either the new AO or the existing PC for the covered entity.
-
Use the Covered Entity Search function to locate the desired covered entity.
-
On the CE Details page, click the Change button for the Authorizing Official.
-
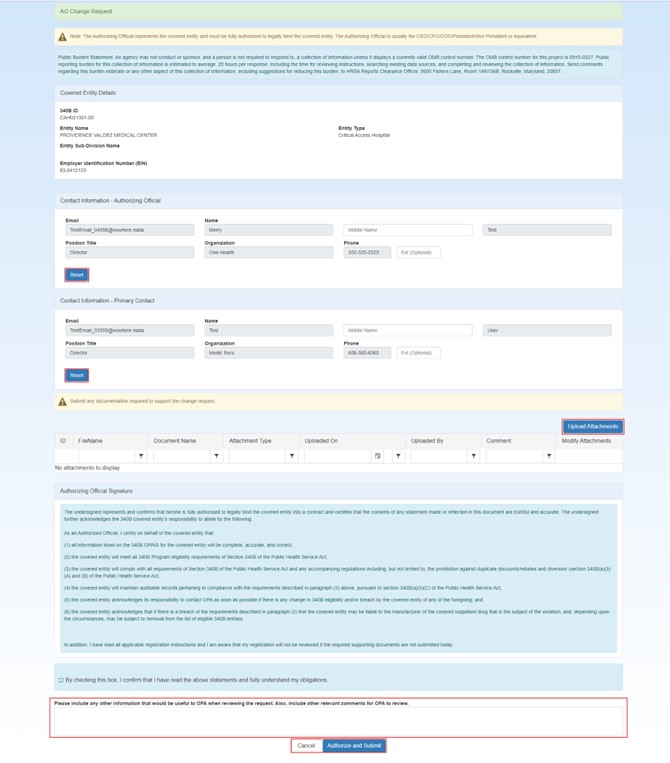
The AO Change Request submission details are displayed with your contact information populated as the Authorizing Official.
-
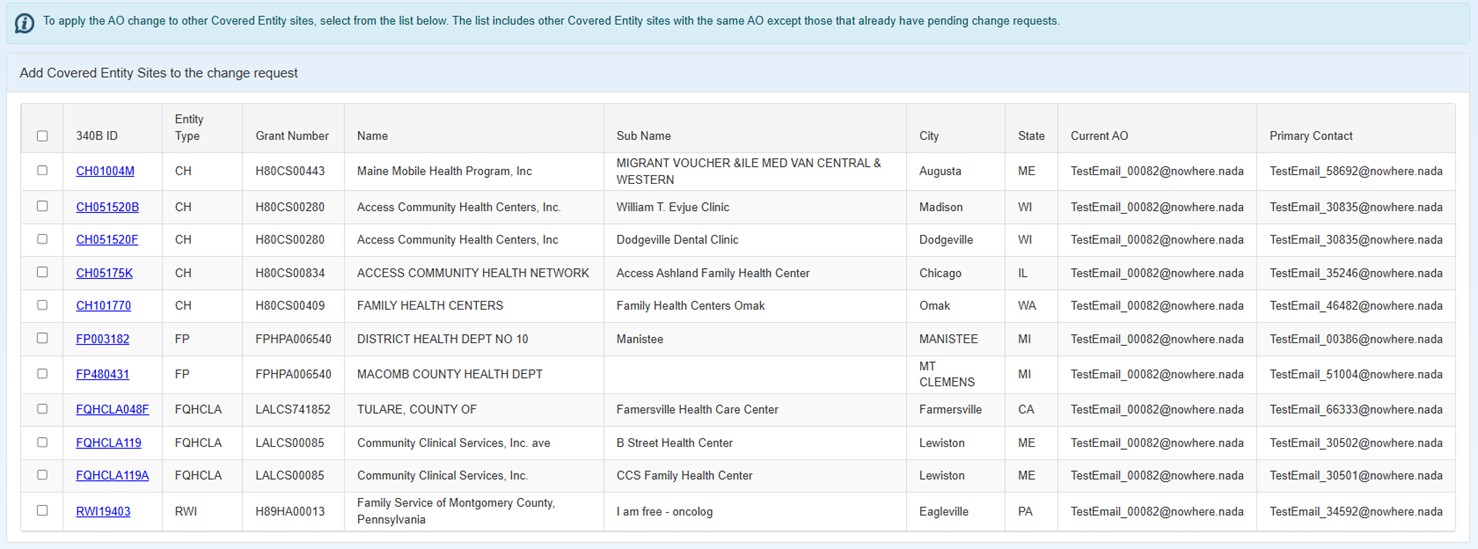
There is also a list of Covered Entities displayed under the “Add Covered Entity sites to the Change Request” section. This is a list of Covered Entities where the current AO of the selected entity is also the AO for these entities. If you also want to change the AO to the newly proposed AO for any of these entities, then use the check box next to the
 340B ID A unique identification number assigned by OPA to each covered entity parent or child site (e.g., child site, subdivisions, or sub-grantees). to select and add these entities to the submission.
 -
If you also want to change the
 PC External user who is designated as a Primary Contact for an entity. This user can enter registrations and update entity information. This user can enter registrations, and update entity information. Any changes to an entity performed by the PC user must be attested to by the AO for that entity. for the group of selected entities, then select the checkbox below the AO Contact Information.
 After selecting the checkbox to update the PC information, use the Contact Information fields to update the PC information.
-
If you have to change the PC for the covered entity then click on Reset under the Contact Information Primary Contact section and enter the new PC information.
-
Click on Upload Attachments to attach documents necessary when reviewing the request.
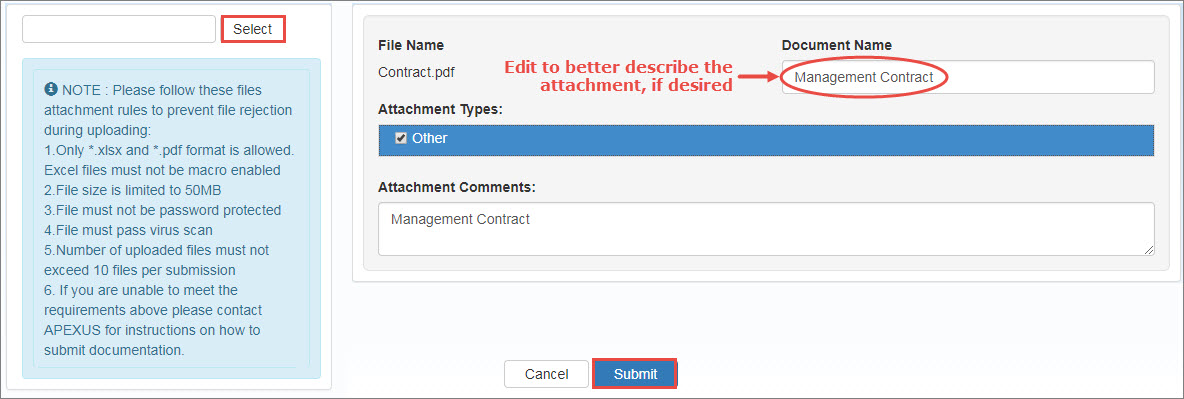
When the attachments upload selection page displays, click the Select button, navigate to the file to be uploaded, and click on it.
Follow these file attachment rules to prevent rejection during uploading:
- Only Microsoft Excel (xlsx) and Adobe PDF formats are allowed. Excel files must not be macro-enabled.
- File size is limited to 50MB.
- Files must not be password protected.
- Files must pass virus scan.
-
Number of uploaded files must not exceed 10 files per submission.
- The file name of the attachment will appear in the Document Name box. It may be changed to better describe the attachment if desired.
- Under Attachment Types, click the Other checkbox..
- Type any additional notes in the Attachment Comments text box.
- Repeat these steps to select and identify any additional attachments.
- Click the Submit button to proceed.
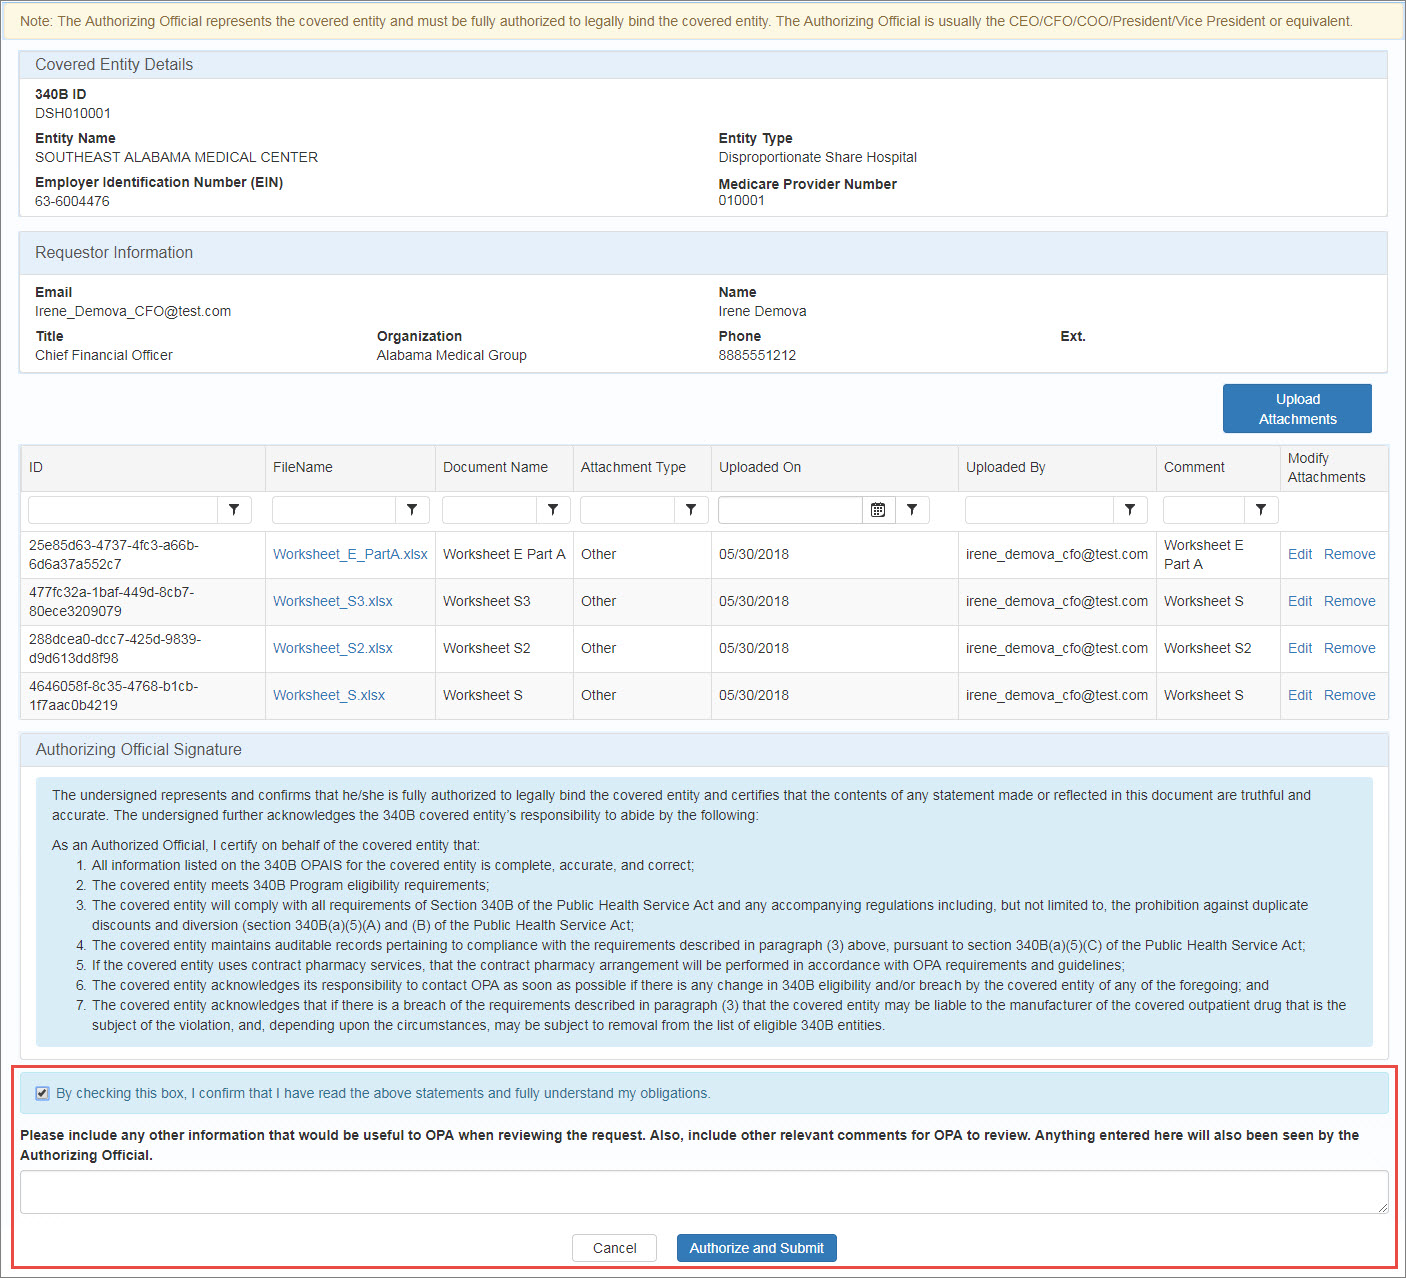
The system will display a list of the selected attachments.
- Click the link in the FileName column to open the attachment with the application that created it (e.g., Excel).
- Click the Edit link to return to the attachments upload selection page to edit the document name, attachment type or comment.
- Click the Remove link to delete the associated attachment from the entity.
-
Type any information that would be useful to OPA when reviewing the request and click the Authorize and Submit button.
AO CR Approval Controls Control Description Checkbox
"By checking this box, I confirm that I have read the above statements and fully understand my obligations."
Select this box to submit the change request for OPA approval.
Textbox
"Please include any other information that would be useful to OPA when reviewing the request. Also, include other relevant comments for OPA to review. Anything entered here will also been seen by the Authorizing Official."
Type any comments that will help OPA in approving the change request.
Cancel
Exit from the attestation page without taking action.
Authorize and Submit
After selecting the checkbox to authorize the submission, click this button to submit the change request for OPA approval. The submission confirmation page will be displayed.
-
All AO change requests must be approved by OPA.
-
Upon OPA approval of an AO change request, both the new AO and the old AO will receive an "Approval of online 340B Change Request" email. The email to the new AO will state that he/she is now the AO. The email to the old AO will state that he/she is no longer the AO.
-
If OPA rejects a change request, both the AO and the PC will receive a Rejection of online 340B Change Request email.
-
-
When the Authorizing Official Change Request Submission message is displayed, click the OK button to return My Dashboard.
During Recertification: After recertification has started, if the Authorizing Official for an entity has to be changed before completing the recertification, then the current AO or PC may submit an AO change request. Only an AO change can be requested in a Change Request when the entity is undergoing recertification. For more, see Changing AO during Recertification


